
Most two-way mirror installations that fail do not fail because of the mirror. They fail because of the room. A two-way mirror is a partially reflective sheet whose effect depends entirely on the lighting differential between its two sides, so the installation job is really two jobs: mounting the sheet correctly, and setting up the two spaces so the effect actually works. This guide covers both, in order.
The optics behind the effect — why the bright side sees a mirror and the dark side sees through — are covered in the two-way mirrors guide, and the sheet specification itself (ratio, tint, thickness, size limits) is covered in the two-way acrylic sheet guide.
This post assumes you have the right sheet and covers getting it onto the wall properly. Also, it’s not only plastic two‑way mirrors we’re talking about — if glass ones are better, we would recommend that you use those.
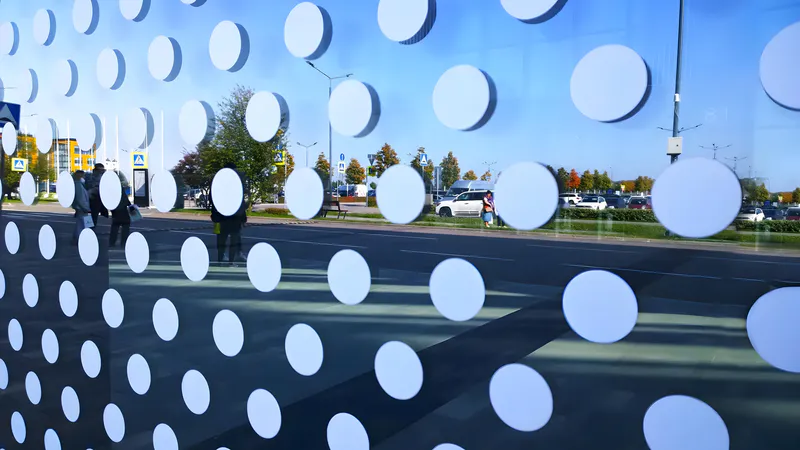
Plan the installation before touching the wall
If you simply need to install a two‑way mirror, you can choose a 50:50 ratio of reflectivity to transmissivity. If you want a completely one‑way effect (people outside can see inside, but those inside cannot see outside), then you need to choose a different ratio, typically 70:30.
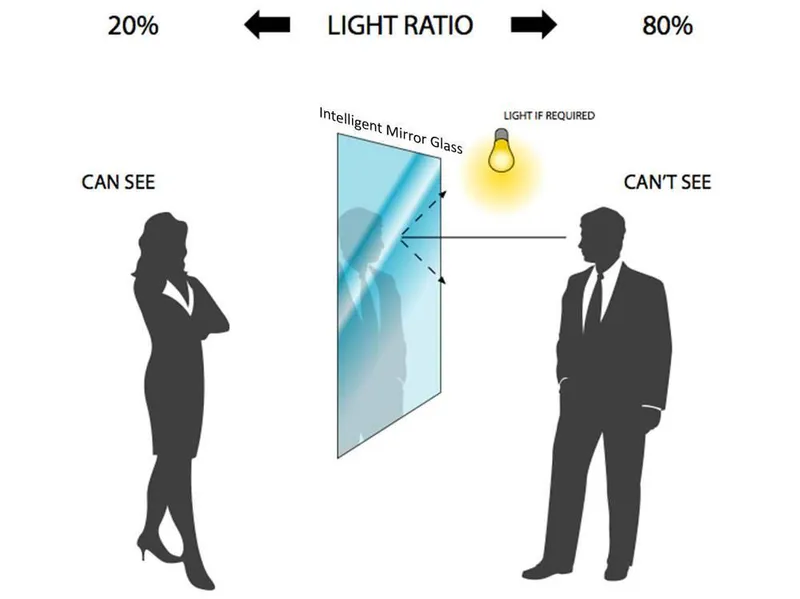
Decide the bright side and the dark side
The mirror face goes toward the bright space; the observation side or screen goes behind, in the dark space. This sounds obvious, but in practice the decision constrains everything else:
- The bright side needs reliable, controllable lighting — ideally artificial light you control, not a window whose output changes through the day.
- The dark side needs to stay genuinely dark during use: no uncovered windows, no indicator LEDs, no light leaking under a door.
- The wall between the two spaces must be light-tight around the mirror opening. Gaps around the frame leak light and weaken the effect.
If you cannot make one side reliably and substantially brighter than the other, fix that before installing anything. No mounting technique compensates for a bad lighting plan.
Confirm the sheet orientation
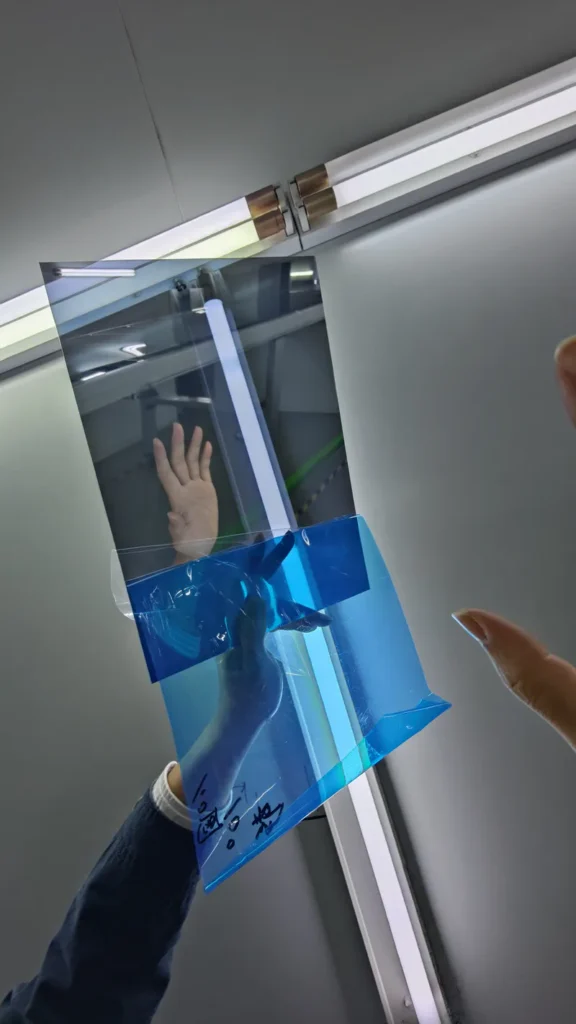
Two-way mirror has a coated face and a back face, and they are not interchangeable. The coated, more reflective face goes toward the bright side. Check the orientation before the sheet goes into a frame — on acrylic two-way the protective films are often different colors on each face, which makes identification easier, but confirm against the supplier’s marking rather than guessing.
Mounting the sheet backwards is one of the most common installation errors we hear about, and it is tedious to reverse after the frame is sealed.
For example, in the plastic two‑way mirrors we produce, the reflective side uses a blue protective film as an indicator, while the light‑transmitting side uses a white protective film.
Mounting: frame the sheet, do not bond it
Standard acrylic mirror is best mounted by bonding the full back surface to a rigid panel. Two-way mirror cannot use that technique, because the back face must stay open to pass light. The sheet therefore has to be supported at its edges by a frame, and the frame has to do the rigidity work the missing backing would have done.
Mounting methods compared
| Method | Suits | Notes |
|---|---|---|
| Edge-engaging frame (channel/rebate) | Most installations | Supports all four edges; the standard approach |
| Wall-opening rebate (mirror set into the wall) | Observation rooms | Cleanest result; light-tight by construction |
| Clip mounting | Small sheets only | Point support allows bowing on larger sheets |
| Adhesive bonding | Not suitable | Blocks the back face; defeats the product |
For anything beyond a small sheet, a frame that captures all four edges in a channel is the right method. Clips support the sheet only at points, and an acrylic sheet supported at points bows between them — the same flex behavior covered in the large mirror sheets guide, made worse here because no backing is possible.
Fixing the frame to the wall
The frame, not the mirror, carries the load into the wall, so the wall fixing follows ordinary heavy-mirror practice.
The installation guidance published by Lowe’s on hanging heavy mirrors is directly applicable to the frame: their method centers on cleat systems, where one cleat fixes level to the wall and a mating cleat on the frame locks over it, and their key point is about what the fixings go into — secure the wall cleat into studs where the positions line up, and where they do not, use wall anchors rated for the load rather than relying on drywall alone.
Home Depot’s bathroom mirror installation guide makes the same structural point as its first preparation rule: use the studs behind the wall to support the mirror wherever possible, and set any brackets on a level plane so they share the weight equally rather than loading one fixing.
Acrylic two-way is light compared to glass, which makes the load easy to handle — but the frame still needs to hold the sheet flat and stay put, so fix it as you would a heavy mirror frame, not as you would a picture.
For the border, we’re not that particular. Rather than putting a lot of effort into fixing the border in place, we prefer to directly reinforce the entire mirror; providing overall hardness paired with a simple border is also a workable approach.
Wall preparation
Preparation is short but matters, particularly where any adhesive or sealant is involved. The mirror installation specialists at BFY Mirror make two points worth adopting from their mounting guide: first, clean the wall surface with alcohol before any adhesive work, because dust and surface oils interfere with adhesion; and second, whatever hardware you choose should be rated at least 50% stronger than the weight it carries, building a safety margin into the fixing rather than working at its limit.
For humid locations they additionally recommend corrosion-resistant hardware (stainless or brass) and a silicone sealant run around the mirror edges after mounting to keep moisture out — directly relevant to two-way installations, since the thin two-way coating fails faster than a standard mirror coating once moisture reaches it from an unsealed edge.
Step-by-step installation
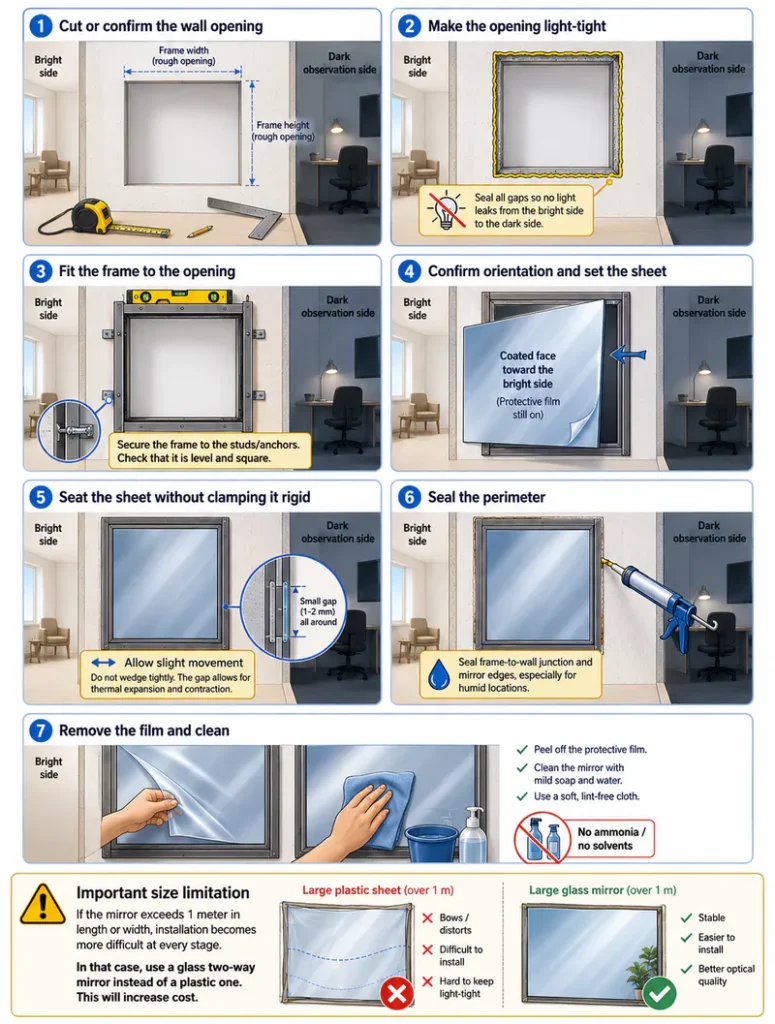
For a typical framed two-way mirror in a wall between two rooms, The installation can be completed in the following seven steps:
- Cut or confirm the wall opening. Size the opening to the frame, not the sheet. Check the opening is square and the surrounding wall surface is flat.
- Make the opening light-tight. Seal gaps in the wall construction around the opening. Light leaking around the mirror from the bright side into the dark side degrades the effect from the observation side.
- Fit the frame to the opening. Fix into studs where possible; use rated anchors where not. Level the frame — an out-of-level mirror is conspicuous once lit.
- Confirm orientation, then set the sheet into the frame. Coated face to the bright side. Keep the protective film on until the sheet is seated.
- Seat the sheet without clamping it rigid. Acrylic moves with temperature. The channel should locate the sheet securely while allowing slight movement; a sheet clamped dead rigid at the edges can bow or crack with thermal cycling.
- Seal the perimeter. Run sealant around the frame-to-wall junction for light-tightness, and around the sheet edges in any humid location to protect the coating.
- Remove the film and clean. Peel the films, then clean the faces with mild soap and water and a soft cloth only — no ammonia or solvent cleaners on acrylic.
The difficulty of these steps is determined by the size of the mirror. If its length and width exceed one meter, then adjustments will be required at every stage of installation. In this situation, plastic two‑way mirrors are no longer suitable; you must install one made of glass. This will incur an additional cost.
Set up the lighting and test
The mirror is installed; now let’s conduct a test.
- Bright side: strong, even, controllable lighting. Office-level brightness or better.
- Dark side: as dark as practical during use — under roughly a tenth of the bright side’s level as a minimum, and darker is better. Cover indicator lights, seal door gaps, blind any windows.
- Test from both sides, at the times of day the installation will be used. A setup that works at night can fail in daylight if a window changes the balance.
- For smart mirror installations, the screen is the light source on the back side; test with the actual screen content, since dark interface themes behave differently from bright ones.
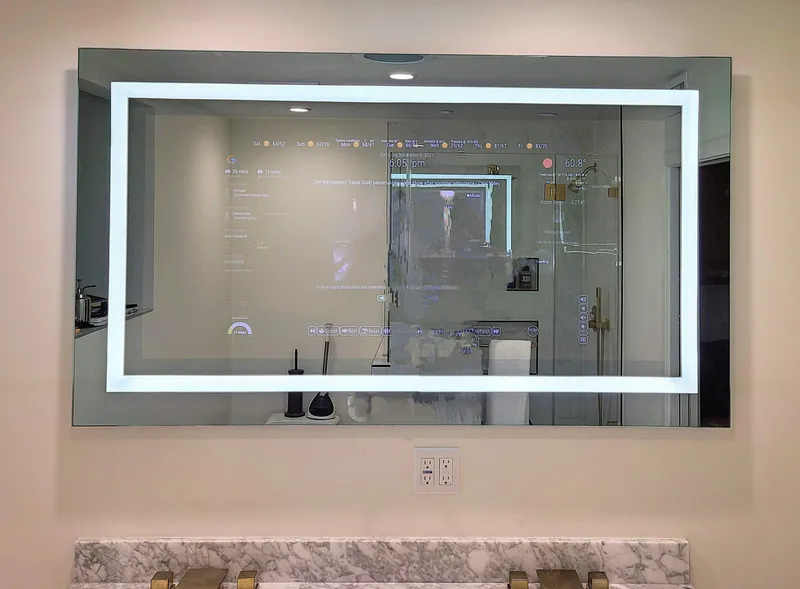
If the dark side is visible from the bright side, the differential is not large enough. Add light to the bright side or remove light from the dark side — in our experience removing light from the dark side is usually the easier fix.
Quick checklist
Before it is fully put into use, you can check according to the following checklist.
- Coated face toward the bright side
- Frame fixed to studs or rated anchors, level, carrying the load
- Sheet seated in a channel with room for thermal movement, not clamped rigid
- Perimeter light-tight; edges sealed in humid locations
- Films removed; faces cleaned with mild soap and water only
- Effect tested from both sides under real use conditions
A two-way mirror installed this way is a stable, low-maintenance fixture — the sheet itself has no moving parts and the coating is protected once the edges are sealed.
Incorrect installation is almost always due to something that should have been framed being glued instead, being installed in the wrong direction, or being placed in a room where light can never have any effect. Get those three right and the rest is ordinary careful work.