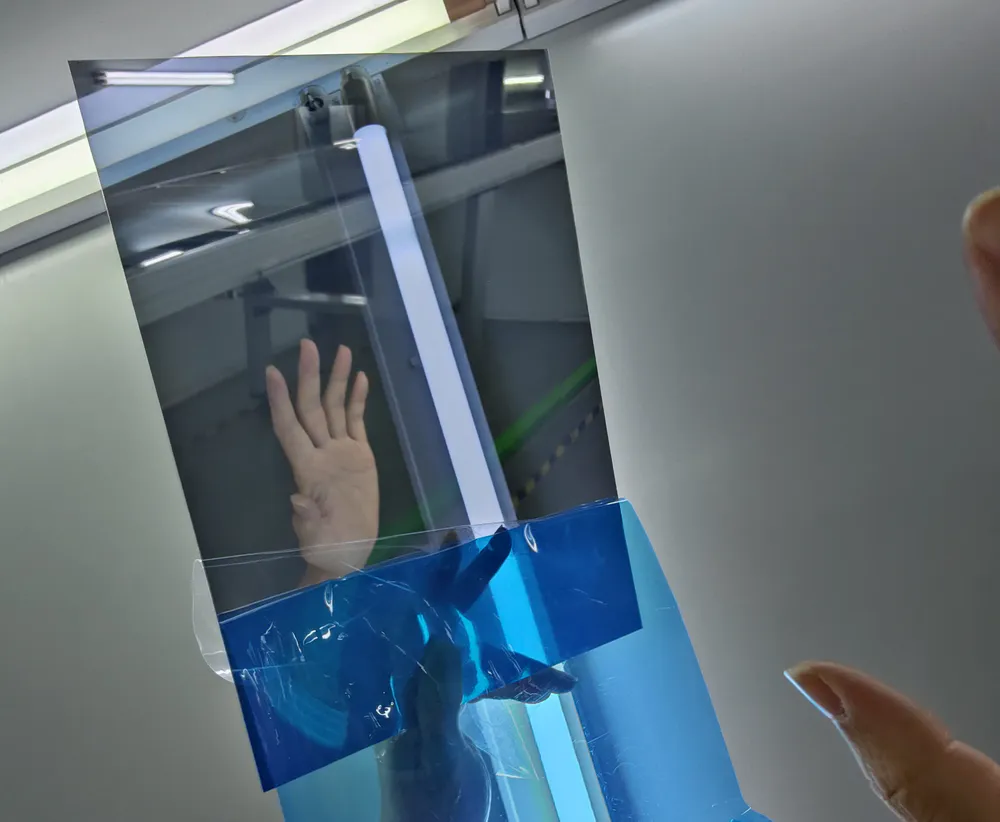
A smart mirror can start up properly, load the weather, and display your calendar. Since its main functions are relatively simple, special attention needs to be paid to its appearance.
The screen may function normally, but the dark rectangle remains clearly visible. The mirror may look realistic in a dimly lit workshop, but it appears washed out when installed in a brightly lit hallway. Or, the display may appear bright enough on a desk, but it almost disappears once a two-way mirror is placed in front of it.
This isn’t because the smart mirror is broken; it’s more due to an issue in the manufacturing.
A successful DIY smart mirror is an optical system: indoor lighting, the two-way mirror, the black mask, the display, the frame, and the software must all work together. None of these components can compensate for an incorrect mirror aspect ratio, an insufficiently bright screen, or light leakage around the display.
If you need the basic optics first, our two-way mirrors guide explains why the effect depends on the balance of light on both sides.
Here, I want to tell you how to use a two-way mirror to make one yourself.
First decide what kind of smart mirror you are building
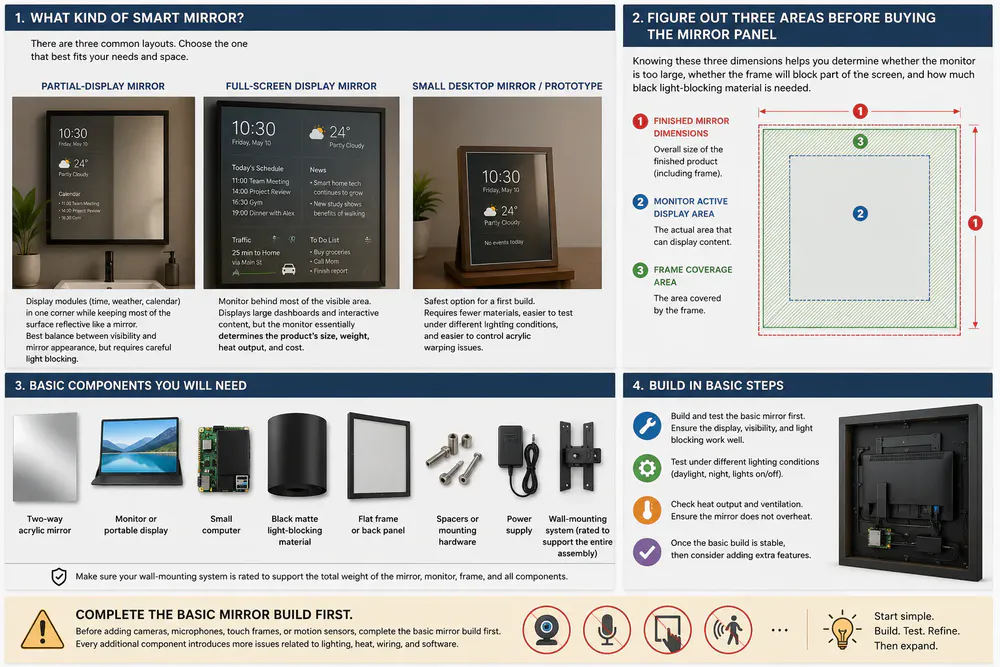
Before purchasing the mirror panel, first figure out three things: the dimensions of the finished mirror, the monitor’s active display area, and the area covered by the frame.
This helps you determine whether the monitor is too large, whether the frame will block part of the screen, and how much black light-blocking material is needed behind the unused mirror area.
Most projects use one of the following three layouts.
A partial-display mirror places time, weather, or calendar modules in one corner while keeping most of the surface reflective like a mirror. This usually provides the best balance between display visibility and mirror appearance, but it requires careful light blocking around the screen.
A full-screen display mirror places a monitor behind most of the visible area. It can display larger dashboards and interactive content, but the monitor essentially determines the finished product’s size, weight, heat output, and cost.
A small desktop mirror or prototype is the safest option for a first build. It requires fewer materials, is easier to test under different lighting conditions, and makes it easier to control acrylic warping issues.
For a basic project, you will typically need a two-way acrylic mirror, a monitor or portable display, a small computer, black matte light-blocking material, a flat frame or back panel, suitable spacers or mounting hardware, a power supply, and a wall-mounting system rated to support the entire assembly.
Before adding cameras, microphones, touch frames, or motion sensors, complete the basic mirror build first. Every additional component introduces more issues related to lighting, heat, wiring, and software.
Test the optical stack before making the frame
The most useful step happens before cutting wood, drilling holes, or installing software.
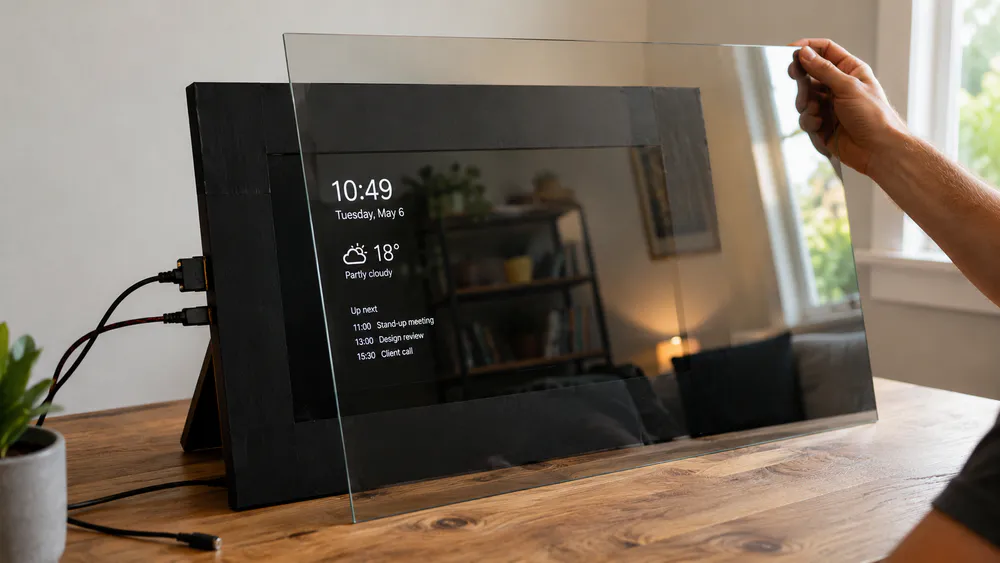
Place the powered display on a table. Cover everything around its active area with matte black card or board. Hold the two-way mirror in front and load a simple screen with white text on a black background.
Test it with the display on and off, first in a bright room and then in a dim room. Stand at the distance and angle from which the finished mirror will normally be viewed.
You are checking more than whether the text appears:
- Is the information bright enough to read without staring?
- Does the unused area still look like a mirror?
- Can you see the outline of the monitor when the screen is off?
- Do cables, controller boards, or indicator lights show through?
- Does the display remain readable under the room’s normal lighting?
- Is the reflection acceptable from the side as well as straight on?
Repeat this test in the room where the mirror will be installed. The same combination can look very different in a workshop, hallway, bedroom, or bathroom.
We would rather see a customer test a loose stack of mirror, mask, and display than finish an attractive frame around a combination that was never going to work.
Choose the two-way mirror for the finished result
Two-way mirrors may look similar in product photos, but their actual performance in front of a screen differs. Key variables include the reflection/transmission balance, thickness, tint, surface flatness, and finished size.
Balance mirror appearance against screen brightness
More reflective sheets look more like ordinary mirrors when the display is dark, but they also block more light from the screen. Sheets with higher light transmission make the interface easier to see, but the surface may appear grayer and reveal more of the structure behind it.
There is no universal smart mirror ratio. The right balance depends on the display brightness, indoor lighting, viewing distance, interface colors, and whether the screen is usually on or off.
For hallway mirrors that only display white text, the mirror-like appearance may be more important. For interactive displays or full-screen dashboards, light transmission may be more critical. Our two-way acrylic mirror sheet guide provides more detailed explanations of ratios, tint, thickness, and size limitations.
For a first build, testing physical samples with a real screen is more reliable than choosing based only on percentage specifications.
Treat 3 mm as a practical reference, not a universal rule
The Raspberry Pi super-slim smart mirror project uses an A3-sized, 3 mm two-way acrylic mirror. That is a useful starting point for a moderate-size DIY project: the sheet remains light and workable while providing more rigidity than very thin material.
A smaller framed mirror may work with a thinner sheet. A larger panel needs better support and may benefit from greater thickness. However, thickness does not turn a large acrylic sheet into glass. If the project requires a large, close-viewed surface with a very flat reflection, glass may still be the better answer.
Allow for tint, frame overlap, and edge support
Grey, smoke, bronze, or other colour casts may be acceptable for white text and simple icons. They matter more when the screen needs to show photographs, skin tones, video, or exact brand colours.
The finished sheet size must also include the visible mirror area, frame overlap, edge support, mounting holes, cable exits, and clearance around the display. Order the mirror after the layout is fixed. A custom-cut acrylic mirror can reduce home drilling and trimming, especially when the design includes holes, radiused corners, or an unusual outline.
The display and black mask usually decide whether the build looks finished
DIY discussions usually spend more time comparing Raspberry Pi models than displays. But from the front view of the finished mirror, the display is usually more important.
Check four things before building around it.
Brightness: The panel must push enough light through the mirror to remain readable in the intended room. Higher brightness helps, but it cannot repair an unsuitable mirror ratio or a poorly masked frame.
Black level: A smart-mirror interface works best on a true black background. Grey backgrounds and glowing menu bars reveal the shape of the display. Show a completely black image in a dark room before committing to the panel.
Viewing angle: A screen may look bright directly in front and lose contrast from the side or from above. A wall mirror is rarely viewed from one fixed position.
Controls and ports: Keep brightness controls, power input, display connector, and storage accessible after assembly. A thin portable monitor is often easier for a first build than dismantling a conventional mains-powered display. Do not open power supplies or handle exposed live circuitry.
The mask is equally important. You can place black cardstock between the display and the two-way acrylic, and cut an opening slightly smaller than the active display area. This prevents light from leaking out around the display and ruining the overall effect.
Please use a matte black material. Let the opening cover the non-display bezel, but do not block the visible pixels. Then, do more than just hide the monitor housing: status indicator lights, light-colored cables, reflective brackets, control boards, and gaps around the back panel can all become visible through the mirror.
The reason the rectangular outline of the screen usually remains visible is often because the maker only covered the bezel, but forgot to deal with the electronic components and light leakage behind it.
Build the mirror in this order
1. Fix the finished layout
Mark the external dimensions, active display area, border overlap sections, cable routing, heat dissipation space, and wall-mount fixing points. Keep key information away from the reflective area where users’ faces typically appear.
2. Bench-test the optical stack
Run a simple black-background, white-text test interface. Try different display settings and viewing angles. Test the effect separately when the screen is on and off.
The first successful test was not seeing the weather information appear, but still seeing a mirror you would be willing to use every day after turning off the display.
3. Prepare the mirror and black mask
During measuring, drilling, or test fitting, keep the protective film on the acrylic sheet. Keep it flat and supported during processing, and do not force screws through holes that are too small.
Cut the black mask so that it covers the non-active borders and all unused areas. Before permanently fixing it in place, check the opening positions against the powered-on screen. If the design includes precise hole positions or complex contours, factory cutting is usually safer.
4. Mount the display close and parallel
Center the active pixel area with the opening, and use brackets or a backplate to support the display independently. Do not allow tape, screws, or brackets to push any part of the mirror surface forward.
5. Block every unintended light path
Power the assembly in a dark room and inspect it from the front. Cover any visible LEDs, light-colored components, reflective metal, and edge gaps. Then repeat the test after turning on the room lights; some light leakage may only become noticeable under daytime ambient conditions.
6. Install the computer and route the cables
Mini PCs or other small computers can also be used. When securing the device, do not block the ports or ventilation. Route cables along the dark interior surfaces and provide strain relief near the power input.
7. Install and configure the software
MagicMirror² is an open-source modular smart-mirror platform. Its official documentation covers the software, while the mirror, display, frame, and mounting remain specific to each project.
Use the current official installation page rather than copying terminal commands from an old tutorial. MagicMirror² currently supports manual installation; third-party automatic installers are community-maintained alternatives and can change independently.
Start with a clock, weather view, and calendar. The configuration guide also provides a configuration checker, which is useful before blaming the hardware for a blank screen.
8. Calibrate the finished mirror in the real room
After installation is complete, adjust the brightness, contrast, font size, module positions, screen rotation, sleep behavior, and auto-start settings again. The position on the wall will change the light reaching both sides of the mirror.
Use large and simple text. Smart mirrors are usually read from a certain distance away, and users are often moving. Crowded dashboards may look impressive in screenshots, but they often perform poorly when mounted on a wall.
If the finished mirror looks wrong
| Symptom | Likely cause | First thing to check |
|---|---|---|
| Text is too dim | Weak display, high reflection, or excessive light in front | Test higher brightness with a simple white-on-black interface |
| The screen rectangle is visible when off | Incomplete masking or light-coloured components behind the sheet | Cover the full inactive area and hide LEDs, cables, boards, and frame gaps |
| The mirror looks transparent | Too much rear light, too little front light, or high transmission | Eliminate light leaks and retest under the intended room lighting |
| The reflection looks wavy | Uneven frame, excessive size, point pressure, or poor support | Release the retainers and test the sheet against a flat support |
| Text looks soft or seems too deep | The display is too far from the mirror or not parallel | Reduce the gap and realign the screen without pressing on the sheet |
| It worked on the desk but not on the wall | The final room changed the front/rear light balance | Repeat the on/off test in the installed position |
| The mirror restarts or overheats | Ventilation, power, storage, or software issue | Check airflow and power first, then simplify the configuration |
Note that it is best to change only one variable at a time. If you change brightness, occlusion, room lighting, and software at the same time, it becomes difficult to determine what exactly truly improved the results.
Building one mirror is different from producing fifty
A one-off project can be adjusted during assembly. Batch production needs the decisions fixed before cutting begins.
For a repeatable smart-mirror product, confirm mirror dimensions and tolerances, coating direction, display-aperture position, hole pattern, reflection/transmission specification, tint consistency, frame overlap, edge condition, packaging, and an approved physical sample.
A prototype proves that the idea works. A production drawing proves that the same result can be repeated.
This is also where an acrylic mirror supplier should ask more than “What size do you need?” We normally need to understand the screen, visible area, room lighting, and expected mirror appearance before recommending a two-way acrylic mirror.
It is finished when the display is readable, the inactive area disappears, the reflection remains acceptable, and the assembly can run without constant adjustment.
Software is flexible. Modules can be moved or replaced later. The difficult parts to correct are the mirror ratio, display brightness, masking layout, frame flatness, and physical size.
Test those together before building around them.
For moderate sizes where low weight, impact resistance, and custom cutting matter, acrylic is often the practical choice. For large panels or projects demanding glass-level flatness, changing the material is better than asking thicker acrylic to solve a problem it cannot fully solve.
For more examples using the same optical principle, see 10 real uses for two-way mirrors.