
Acrylic convex mirrors are a relatively common type in the curved mirror market. Primarily designed for outdoor applications—such as traffic mirrors, warehouse corner mirrors, and retail security mirrors—they are, at their core, convex mirror products.
Take the warehouse corner mirror as an example: when approaching a blind spot in a warehouse aisle, a quick glance upward at the convex mirror reveals smaller reflections of people and goods, while significantly broadening the visible field of view. This optical advantage makes navigating intersections much safer.
However, the breadth of this viewing field ultimately depends on how the convex mirror is manufactured. Variations at any stage of the production process can potentially compromise the inherent advantages of a warehouse mirror.
A convex mirror’s size, curvature, thickness, and structure all directly impact its real-world performance. The manufacturing of acrylic convex mirrors is, in essence, the process of rigorously attending to these details at every single stage of production.
By following the transformation of a raw transparent sheet into a finished product, we can truly understand how the quality of a mirror is defined.
What Determines Quality in Acrylic Convex Mirror Manufacturing?
The quality of an acrylic convex mirror depends largely on the quality of the base material and the required final dimensions.
If recycled or aged materials are used, it is impossible to predict how the degraded raw material will impact the manufacturing process over time. Virgin material, on the other hand, performs significantly better throughout production.
Before production begins, manufacturers typically need to determine the specific application environment for the mirror.
For instance, a safety mirror suspended from a retail ceiling has very different requirements in terms of size, viewing distance, and installation method compared to a traffic mirror used to monitor oncoming vehicles at a parking garage exit. As shown in the figure, the multistory parking lot and the shops vary in both placement and size.
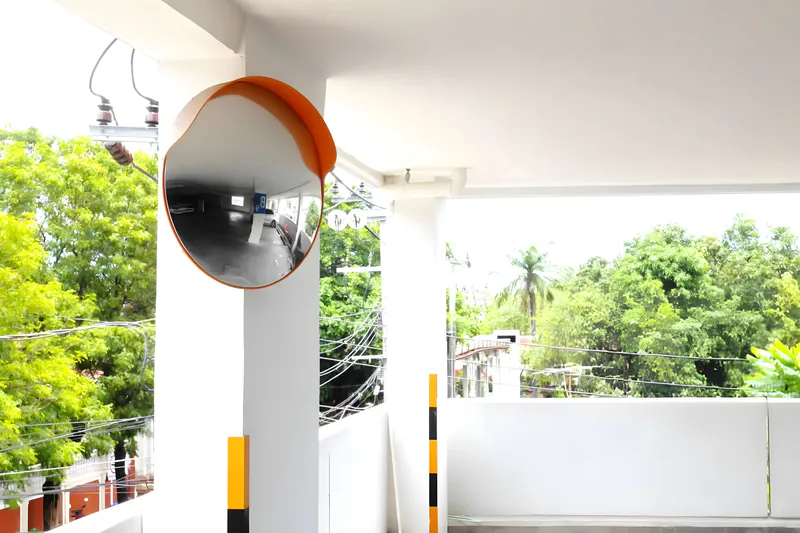
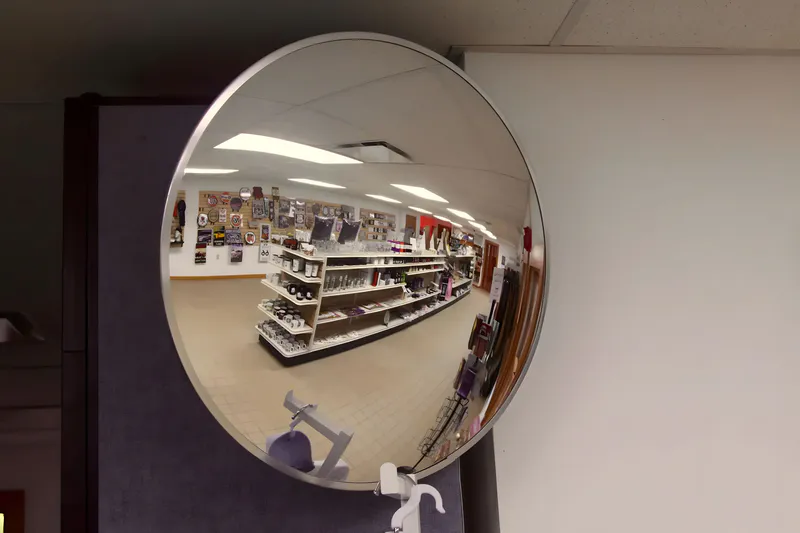
These distinctions directly influence panel thickness, the curvature of the formed surface, and whether additional outdoor weatherproofing is necessary.
Naturally, there is a distinct difference in quality between indoor and outdoor convex mirrors.
Taking the common back-coating structure as an example, an acrylic convex mirror can be broken down into three interdependent components:
- Acrylic Substrate: Provides a transparent viewing surface and maintains the desired shape after forming. Its quality directly dictates the lifespan of the convex mirror.
- Metallic Reflective Layer: Grants the curved surface its reflective properties, commonly achieved through vacuum aluminum plating. This layer is typically applied directly to the substrate; any flaws in this coating indicate an immature manufacturing process.
- Protective Backing: Shields the delicate metallic mirror layer, minimizing damage during subsequent processing, assembly, and daily use. A high-quality backing helps slow down the oxidation of the metal coating in outdoor environments.
The surface condition, thickness tolerance, and formability of the PMMA sheet all play a critical role in downstream processing.
If a manufacturer relies on stagnant stock for the substrate, a careful inspection will reveal the microscopic details that ultimately compromise the finished convex mirror. For example, pre-existing surface scratches or impurities will not simply vanish once the metallic layer is applied.
The degree of curvature must also be established beforehand. For mirrors of the same size, a sharper arc generally widens the field of view while rendering the reflected image smaller.
If the dimensions and viewing distance have not yet been finalized, you can refer to the Acrylic Convex Mirror Size and Buying Guide as a starting point. The earlier these parameters are confirmed, the more targeted and efficient the subsequent prototyping process will be.
Steps to Manufacture Acrylic Convex Mirrors
Here we use extruded acrylic sheets to manufacture convex mirrors, a process that involves sheet production, thermoforming, reflective layer application, and post-processing.
The extrusion process determines the thickness and surface condition of the substrate, thermoforming shapes the convex contour, and coating endows the lens with reflective properties.
In actual production, the sequence of processes may be adjusted depending on the equipment, materials, and product design. Furthermore, different manufacturers may adopt varying workflows when factoring in production costs.
If pre-coated mirror sheets are used for forming, it is essential to verify whether the reflective and backing layers can withstand heating and stretching. Not all flat acrylic mirror sheets are suitable for direct thermoforming.
1. Determine Product Specifications and Molding Methods
Before production, determine the convex mirror’s dimensions, curvature or arch height, sheet thickness, mounting structure, and operating environment. Based on these parameters, select the appropriate molding mold, clamping frame, and processing method. For custom products, first verify the curved shape, visual performance, and assembly dimensions using prototypes before finalizing mass production requirements. The mold design and sheet selection for the convex mirror form the foundation of all subsequent forming operations.
2. Prepare PMMA Resin and Control Moisture Content
Select PMMA resin pellets that meet the requirements for sheet extrusion and mirror processing, verifying the material grade, batch, and cleanliness.
Pre-dry the material according to the supplier’s specifications and its actual moisture content. Excessive moisture can cause bubbles or streaks during extrusion, so drying conditions must be determined based on the material’s current state.
If the manufacturer provides aged or inventory stock material, combining it with subsequent processes may introduce various unforeseen variables.
3. Melt Plasticization and Continuous Extrusion
Feed the prepared PMMA pellets into the extruder. The raw material is heated inside the barrel and progressively plasticized as it is conveyed by the screw, forming a polymer melt.
The melt is continuously extruded through a flat die to form a sheet blank. Throughout production, feed rate, temperature, and extrusion stability must be strictly controlled to provide stable conditions for subsequent gauge thickness control and surface shaping.
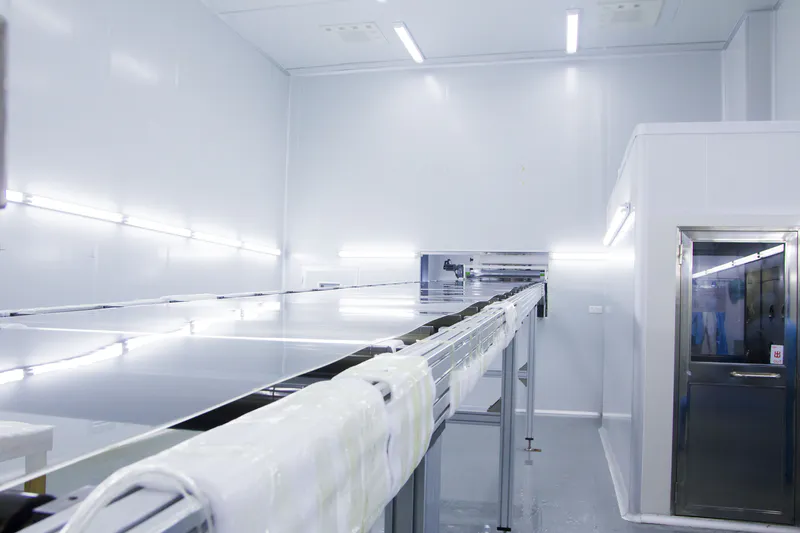
Here is our company’s sheet extrusion production line.
4. Roll Calendering and Cooling
The extruded sheet blank enters a temperature-controlled roller stack, where the thickness is regulated via the gap between the rollers, and the sheet surface is finished by the roller faces.
Subsequently, the sheet continues to cool, gradually developing into a dimensionally stable transparent acrylic flat sheet. Roller temperatures, nip gaps, and cooling conditions must be coordinated with the sheet thickness and line speed.
5. Sheet Inspection, Masking, and Cut-to-Size
Inspect the sheet for thickness, flatness, and surface quality, screening out materials with noticeable bubbles, impurities, flow lines, or scratches. Thermoforming cannot eliminate the inherent optical defects of the base substrate, which is why sheets intended for convex mirrors must be thoroughly vetted at this stage.
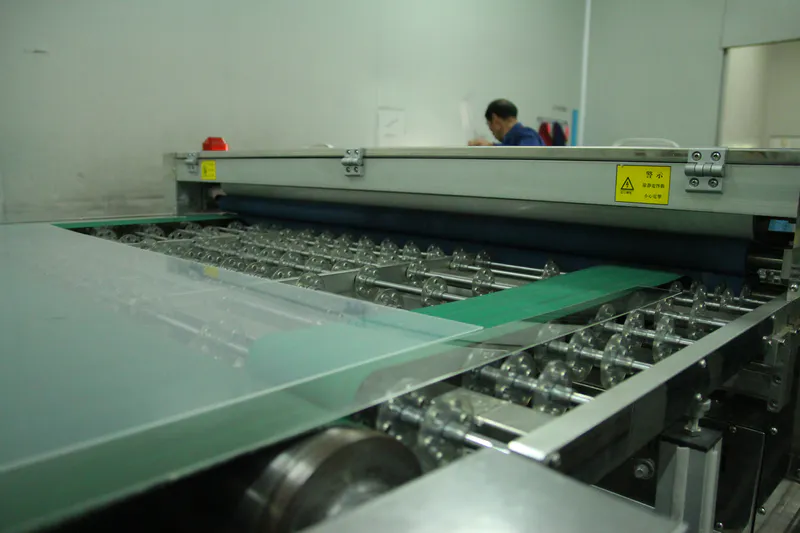
The sheets are then laminated with a protective film and cut to specified dimensions according to storage or downstream processing requirements. At this stage, we usually require this to be done three times. Trying to fix it later in the process would take significantly more time.
6. Blank Cutting for Thermoforming Requirements
Based on the lens dimensions and equipment clamping limits, cut the sheet into thermoforming blanks, leaving allowances for clamping zones and final trimming.
When blanking, account for the extrusion direction and dimensional changes upon heating, using trial samples to determine the optimal blank dimensions.
7. Finalizing Pre-Thermoforming Preparations
Check the cleanliness of the blank surface; if the sheet has absorbed excessive moisture, perform pre-drying according to material guidelines.
Process the protective film based on the forming technology, and secure the blank onto the clamping frame or mold. Whether to retain the protective film depends on compatibility between the film and the forming conditions.
8. Heating and Forming the Convex Contour
Heat the blank to a formable state, allowing the sheet to stretch according to the predetermined contour. Extruded acrylic sheets are quite sensitive to uneven heating, requiring precise control over temperature distribution across all zones to prevent distorted curved surfaces.
Next, employ vacuum forming, pressure forming, or corresponding mold-forming techniques according to the product structure to create the desired convexity. These methods represent various process choices; notably, free blowing or free vacuum forming can control arch height via clamping frames and pressure regulation, minimizing contact between the active optical surface and the mold.
ACRYLITE’s Acrylic Thermoforming Guide outlines different forming methods and the impact of heating, tooling, and cooling conditions on the final result. In a production environment, these parameters must be fine-tuned in tandem rather than relying on a single temperature reading alone.
9. Cooling, Setting, and Demolding
Once forming is complete, cool the part uniformly while maintaining its curved profile. Demold the lens once it has achieved sufficient dimensional stability, and inspect for warping, abnormal springback, or localized geometric deviations.
For products requiring lower residual stress from forming, an annealing step can be introduced following a validated process.
10. Surface Cleaning and Metallization Preparation
Inspect the surface of the molded part, completing necessary dust removal, cleaning, and drying according to coating requirements to ensure the target surface is free of contaminants that could compromise the coating.
Minimize contact with the target surface during transfer and handling to prevent reintroducing fingerprints, scratches, or dust. Surface condition directly dictates the final visual quality of the mirror.
11. Vacuum Aluminizing to Create the Reflective Layer
Load the molded parts into the vacuum deposition system and deposit aluminum onto the designated surface under specified conditions, forming a thin metallic layer with specular reflective properties.
Control the deposition rate and coverage uniformity during the coating process to ensure the lens achieves the required product reflectivity. Vacuum aluminizing is the standard reflective layer fabrication method referenced in public literature for convex mirror manufacturing.
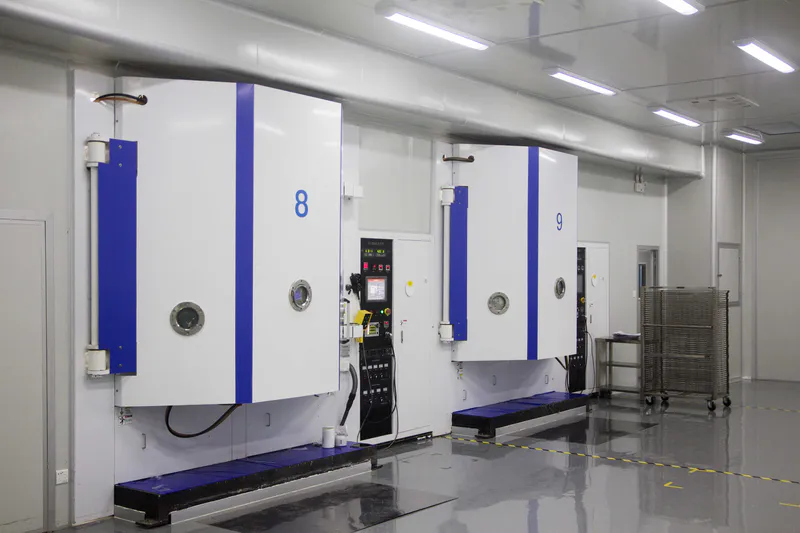
Here is the large vacuum coating machine used by our department. Generally speaking, once we reach this stage, the convex mirror is almost complete.
12. Applying the Rear Protective Coating
Following aluminum deposition, apply a matching protective backing coating over the exterior of the metallic reflective layer, and dry or cure it according to the coating system specifications.
The rear protective layer serves to shield the metal coating. Its material composition and coverage specifications should be determined based on the intended operating environment, whether indoor or outdoor.
13. Precision Trimming and Secondary Machining
Trim the outer contour of the lens according to the final blueprints, removing the clamping borders and excess material left over from the forming process. Complete any holes, notches, and edge treatments as specified by the order, and inspect the cut edges for chipping, cracking, or localized damage.
The exact timing and location of precision trimming can be adjusted depending on the production line layout. The sequence outlined here—trimming after metallization and back-coating—is a standard approach found in public convex mirror manufacturing data.
14. Functional Treatments and Assembly per Order
Perform any additional order-specific processes such as front-side abrasion-resistant hard coating, adhesive backing application, or mounting surface preparation. Front-side hardening is an independent functional treatment that should be scheduled based on product requirements.
Products requiring supporting backplanes or other structural components enter the assembly stage once lens fabrication is complete, verifying alignment and fit. Orders delivered strictly as standalone lenses are processed according to agreed-upon specifications.
Finished traffic convex mirrors require the mirror face and mounting hardware to be considered as a cohesive unit. Buyers should clarify the scope of supply in advance to avoid receiving flawless lenses only to find required mounting brackets missing.
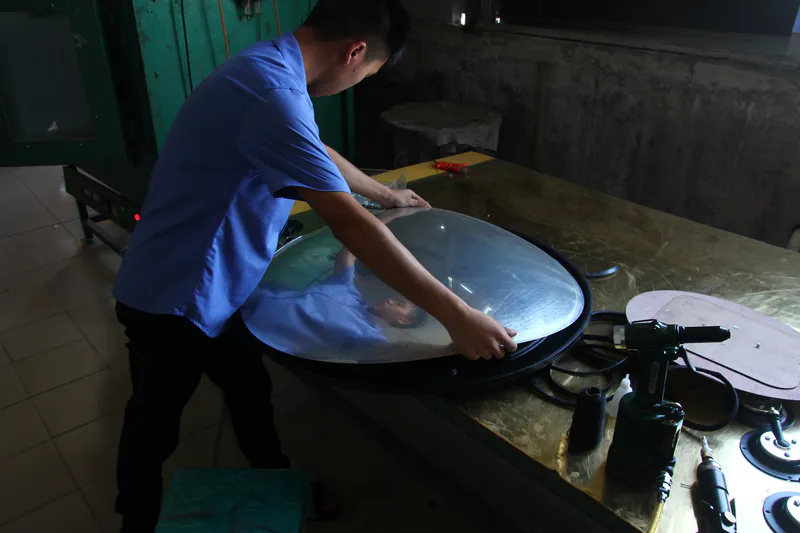
We also provide a matching installation service. Our technicians will carry out the installation with the protective film still attached to the mirror.
15. Final Product Inspection
Establish inspection criteria based on engineering drawings, approved samples, and order requirements, focusing primarily on:
- Dimensions and Curvature: Verify overall dimensions, arch height or curvature, hole locations, and thickness at designated points.
- Surface Appearance: Check for scratches, bubbles, impurities, pinholes in the coating, and protective layer defects.
- Reflective Performance: Evaluate clarity, field of view, and abnormal local optical distortion under agreed-upon viewing conditions.
- Coatings and Assembly: Verify coating adhesion, adhesive backing bond strength, and accessory installation quality as agreed.
Products subject to wear resistance, weathering, or moisture resistance requirements must also undergo corresponding verification tests as stipulated by the order.
16. Surface Protection and Packaging for Shipment
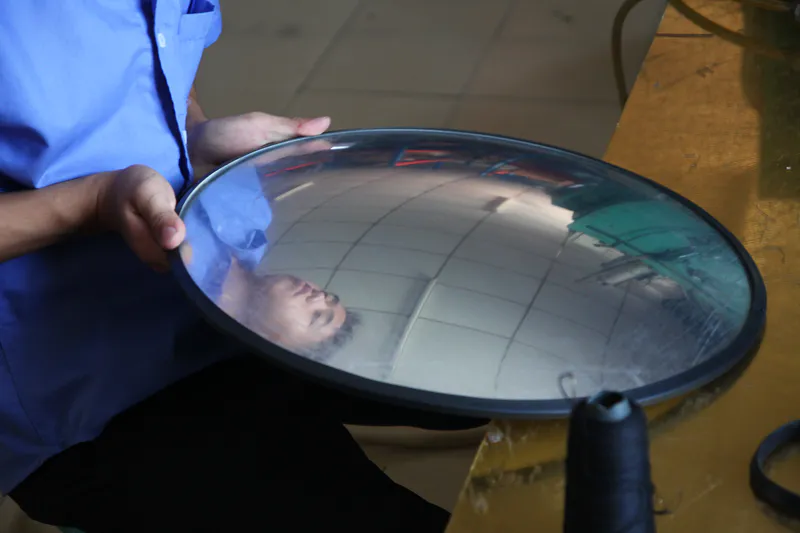
Following successful inspection, apply a protective film or other curve-conforming protective material to the mirror surface, and place separators and cushioning between lenses to prevent mutual friction or localized crushing during transit.
Configure outer packaging based on lens dimensions, order quantity, and shipping method, clearly labeling the product specifications, quantities, and batch numbers.
Common Defects in Acrylic Convex Mirror Manufacturing
Once you understand the manufacturing process, it becomes much easier to pinpoint the root cause of defects in the finished product.
An issue like “lack of clarity,” for instance, could originate from the raw sheet, the molding stage, the coating process, or even arise as late as assembly.
The phenomena listed below can serve as useful investigative clues, but visual appearance alone should not be taken as the definitive root cause.
| Common Issue | Priority Inspection Area | Direction for Improvement |
|---|---|---|
| Localized distortion or abrupt waves in the image | Molded surface, cooling process, assembly stress | Compare the mirror surface state before and after demolding; inspect tooling and fixing positions |
| Internal bubbles or noticeable whitening in the sheet | Raw material condition, moisture content, heating conditions | Check material storage and pretreatment, and re-verify the heating process |
| Pinholes, spots, or uneven reflection on the mirror surface | Pre-coating cleanliness, contamination, deposition conditions | Inspect the cleaning and transfer environment; review the coating process |
| Edge chipping, micro-cracks, or damage to the reflective layer | Trimming, handling, component contact | Adjust support and processing methods to minimize edge stress and friction |
| Normal imaging before framing, but distortion after framing | Frame fit, backing support, fastening method | Check assembly clearance and localized pressure points |
It is also essential to distinguish between normal optical characteristics and actual manufacturing defects. Convex mirrors naturally shrink the image size, and their edges will exhibit a fisheye effect unlike that of flat mirrors.
What truly requires attention are subtle deviations from the design specifications or approved samples. This is also why quality inspection cannot rely merely on a superficial remark that “it looks bright enough.” Brightness, curvature, surface condition, and assembly reliability must all be evaluated independently.
How to Test the Quality of an Acrylic Convex Mirror?
A useful inspection protocol should ensure that both the buyer and the manufacturer share a common understanding of what constitutes “acceptable.” In this regard, the most common approach is the use of third-party testing reports.
While well-established manufacturers can provide comprehensive testing reports, our experience shows that most factory certifications are typically tied to their internal operations. It is rare for manufacturers to test their own products directly.
Therefore, you can first establish routine factory inspection items, and then incorporate performance verifications for wear resistance, weather resistance, or impact resistance based on the intended application. Testing methods, specimen conditions, and acceptance criteria should all be agreed upon in advance.
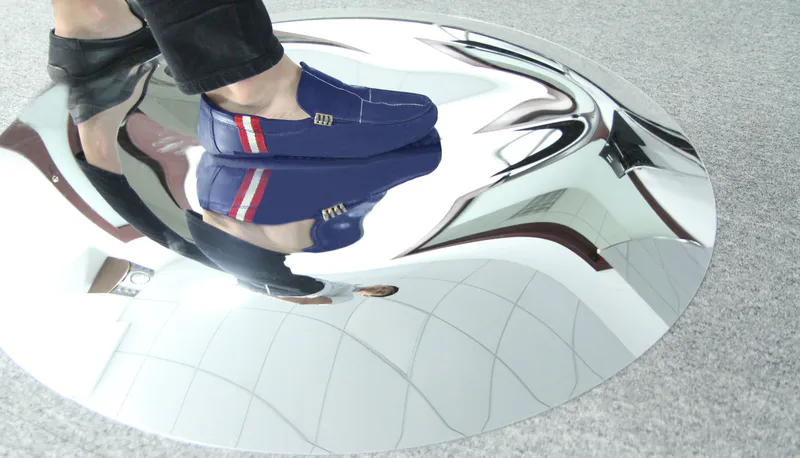
When we do testing, what we like most is to directly conduct brute-force stress testing—just step on it directly and then observe the condition of the mirror.
Standardized Testing: Making Performance Results Comparable
For surface wear resistance, you can refer to ASTM D1044, Standard Test Method for Resistance of Transparent Plastics to Surface Abrasion. This method evaluates the abrasion resistance of transparent plastic specimens by measuring changes in haze under specified conditions.
When applied to acrylic convex mirror projects, attention must be paid to the specimen form. For example, flat transparent specimens with the same material and surface treatment can help evaluate the wear resistance of the relevant surface, but their results cannot directly substitute for the reflective performance inspection of coated curved mirrors.
For outdoor applications, you can refer to ASTM G154, Standard Practice for Operating Fluorescent Ultraviolet (UV) Lamp Apparatus for Exposure of Materials. Specimens are exposed to agreed-upon UV, temperature, and moisture conditions, after which changes in appearance, reflective coating, or other properties are inspected.
While ASTM G154 provides the exposure test method, the specific test cycles, duration, and acceptance criteria still need to be determined. Furthermore, the number of test hours cannot be directly converted into years of outdoor service life.
Finished Product Inspection: Translating Drawing Requirements to the Mirror
In addition to material or coating tests, the actually delivered products must also be inspected.
| Inspection Item | Recommended Inspection Method | Key Focus Areas |
|---|---|---|
| Dimensions & Curvature | Inspect shape, sagitta, mounting areas, and thickness at critical points against the drawings | Consistency with agreed tolerances and approved samples |
| Mirror Appearance | Inspect the front, back, and edges section by section under fixed lighting conditions | Scratches, spots, coating defects, and edge damage |
| Imaging Performance | Observe a reference pattern or target at a fixed distance and angle | Abnormal local distortion and whether the effective viewing area meets requirements |
| Assembly Status | Install samples using actual frames, back panels, and brackets | Deformation after fixing, as well as proper adjustment and locking functions |
| Finished Product Impact Resistance | For projects with explicit requirements, verify complete samples under agreed conditions | Record installation method, impact location, impact conditions, and failure criteria |
If the order specifies reflectivity metrics, instrumental methods suitable for curved surfaces and measurement geometries should also be employed. Issues visible to the naked eye often appear even more severe under instrument testing.
Recommended Additional Factory Inspections: Placing the Mirror Back into Its Application Environment
While standardized testing helps compare performance, simulated real-world inspections answer a more direct question: Once installed, does the mirror actually work well?
With this goal in mind, some manufacturers—like us—incorporate the following four checks as the final line of defense prior to shipment:
- Fix the camera/viewing position and compare against a grid and approved samples. Place the mirror in a fixed position and observe a grid or marker board at a consistent distance and lighting. Focus on whether local images exhibit abnormal undulations and record any differences from the approved sample. Note that the grid lines in a convex mirror will naturally curve; “all straight lines” should not be treated as an acceptance criterion.
- Move the target from one side of the field of view to the other. Within the intended viewing area, have personnel or a marker move along a fixed route to check whether the target is easily recognizable as it enters, passes through, and leaves the mirror surface. This is much closer to actual corner-observation conditions than simply looking at a stationary object in the center of the mirror.
- Compare imaging before and after installation. First inspect the standalone lens, then install it into the actual frame or bracket, and repeat the same observation. If changes occur after assembly, the fixing method and support structure should be inspected rather than simply replacing the lens material.
- Conduct sampling verification of packaged products. Agree upon packaging verification conditions based on actual shipping methods, and re-inspect the mirror surface, edges, accessories, and assembly status after unpacking. The inspection should reflect the condition of the product upon arrival at the customer’s hands.
During execution, observation distance, lighting, target position, shooting angle, and acceptance criteria can be documented so that different batches follow the same methodology. In this way, on-site observation transforms from subjective impressions into evidence-based comparisons.
Custom Acrylic Convex Mirror Manufacturing: From Sample to Production
Once a sample is approved, the next objective is to ensure consistent performance across mass-produced convex mirrors, typically maintaining a high yield rate. It is worth noting that we intentionally avoid committing to a fixed numerical yield percentage in writing at this stage.
Because customized products often experience varying yields due to the nature of the production process, guaranteeing an absolute yield figure during mass production is neither practical nor realistic. We refrain from providing misleading figures, as each specific situation must be evaluated on its own merits.
Custom acrylic convex mirrors often involve a combination of dimensions, curvatures, thickness, surface treatments, and mounting structures. When approving the sample, materials and key processes closely resembling mass production should be utilized, while documenting the following information:
- Product Specifications: Dimensions, effective reflective area, curvature requirements, critical thicknesses, and assembly sizes.
- Appearance & Imaging Standards: Approved samples, defect criteria, and standardized viewing conditions.
- Material & Process Configuration: Base material, reflective coating, protective system, and confirmed functional treatments.
- Delivery Requirements: Accessory checklist, protective film, packaging, batch identification, and sampling inspection plans.
Should there be any subsequent material substitutions, coating adjustments, or changes to primary molding conditions, an assessment must be made to determine whether re-validation is necessary. While a sample provides a starting point, a stable process and clear inspection criteria are essential to carrying that quality through to the entire production run.
For buyers, understanding the manufacturing process also facilitates more precise communication. Rather than simply asking for something “clearer and more durable,” it is far more effective to specify the viewing distance, coverage area, mounting method, and operating environment. This enables the manufacturer to translate these requirements into tailored material, curvature, and protection solutions.
If you are currently planning a new product, you can begin by exploring our custom acrylic convex mirrors, and reach out with your application scenario, dimensions, and assembly requirements to confirm your sample. Ultimately, a mirror worth delivering is one that fulfills the project’s expectations all the way from the factory floor through transportation and final installation.